Among the vast (and growing) list of tasks I need to complete before making real progress on this dress is finalizing the bodice and sleeve patterns so I can do things like stitch a few dozen eyelets into the side openings.
No, actually, I'm not thinking about the tablet-woven band. Really. I'm not. Much. (
Did you know it can take more than an hour of work to weave a single inch? I need at least 40 inches. I. frickin e. Sabine is doomed.) I'm also not thinking about the collar design I've yet to draw out in a way I like. Or the labyrinthine construction of the sleeves, which will require fully as many pins as the trim on the skirt did. Or the belt that I definitely didn't allot any time to stitch...
 |
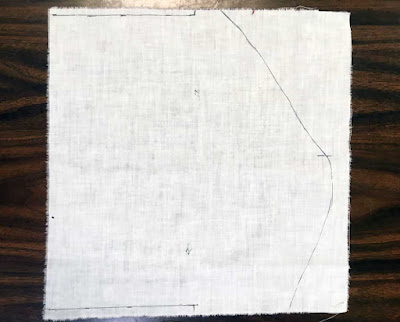
| Very very slight differences between pattern one, on the right, and pattern two, on the left. |
So let's talk about the bodice pattern, shall we? Since it is actually completed now. I used a sharpie to mark the seam lines and folds on the fitted part of my first mockup before ripping all the seams and trimming excess fabric away. When I traced the altered pattern, I smoothed and
very slightly deepened the armscye curve, and cut the new bodice panels to sixteen inches wide instead of eighteen, in hopes of giving myself a little room for adjustment. I also marked the sloped shoulder seam, which works wonders in terms of diminishing the horizontal wrinkling I tend to get radiating from the sleeve.
 |
| The sleeve, meanwhile, just needed to be trimmed to match its mate. |
I was quite happy with the fit I got on the one sleeve I bothered to pin and stitch last time, so decided to start by trimming down the other sleeve to match. It's much easier to see what might need altering if I don't need to move extra flaps of fabric out of the way. And I remembered to mark the shoulder seam before removing the sleeve from the mockup, which probably saved me a lot of fiddling.
 |
| I N I Q U I T Y |
And I still used the lacing tapes with the failure grommets. Lacing the holes that had lost their grommets was a bit challenging, but the tapes are holding up well, and I think they'll last until I can bind those eyelets just fine. I'm also getting better at remembering to keep the laces loose until
after I've wriggled into the garment. Makes life much easier.
 |
| Super fashionable extra lacing tapes dangling off my bodice. |
I thought it might be wise to try this over the proper undergarments, rather than a stretchy short-sleeved shirt. Of course, that meant I took about three extra hours of lazing around and avoiding going the seven steps to the closet to get out a chemise before I could try on this iteration. (This sort of behavior doesn't bode well for my ambitions to make a fussy mid-Victorian ball gown someday. All those underpinnings!)
Laziness aside, I obviously have a decent range of motion now, and I can even make the body panels narrower still—they aren't laced closed as in the last iteration, but they're very close to it from about the bottom of my rib cage down. I didn't quite eliminate the big horizontal wrinkle emanating from my armpit, but I think I'd need stretch fabric or zero ease for motion to make it go away completely.
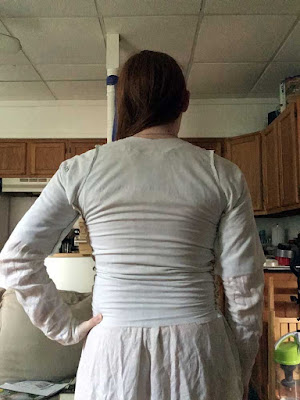 |
| Still cleverly blocking my sink full of dishes from view. |
I don't love the loose fabric at the back of my left shoulder, but there are (again) range of motion considerations. With my arm canted back as it is, all the fabric that allows me full forward and across-the-body motion has to go somewhere, and that somewhere is bagging at the back of my shoulder.
I decided to trim down the back sleeve head curve just a touch, which ought to clean up the shoulders a bit without seriously limiting my arm movement. From this angle it's very obvious that my sleeve pattern is now about two inches too short, as well, so the final pattern will get that length added back on. I want the seam joining the lower sleeves to land right about my elbow—with luck, that'll put the sleeve cuff at or just before the base of my thumb joint.
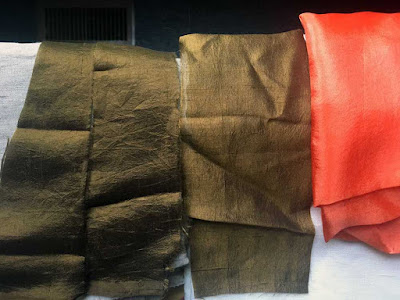 |
| The peach fabric is just there for funsies. And in a bid to keep the rest of the white linen from totally throwing off my camera. |
At last, time to make some decisions about fabrics and construction details. I have several yards of natural grey linen, perfect for a nun's robe but little else, that I've been trying to find uses for. I also have
quite a bit of white linen. And I have fairly sheer dress fabric that shifts color every time I photograph it but which I have declared green. (Also there is the very extremely bright peach for lining the sleeves and making a belt.) I tried laying scraps of the dress fabric over the grey linen (left) and white linen (right) to see how the underlayer affected the color, and much preferred the white underneath.
Only later did it occur to me that all my undergarments are white linen, so it's doubly good that I chose the white for the support layer. The color shift would have annoyed me.
Then I packed all the many fabrics in a bag and went to the laundromat. I spend a lot of time there anyway, what with the flea infestation (no, I haven't seen any live ones recently, but I'm still not taking any chances with the little pests) and preferring to do laundry when I'm completely out of things to wear, and it is the easiest access to long smooth counters I have. Also, in a college town on Sunday morning,
no one is there.
 |
| Vast seam allowances, in case of fraying. |
I double checked that I was using the correct pattern (they look nearly identical in shape, though one is narrower than the other) before laying out my linen to mark the pieces. I put the front and back bodice pieces next to each other, with the grain running vertically, and traced around each with a pencil. Pen might bleed when washed, and I don't want to risk it, even though scratching away with a pencil is slower. I also narrowed the bottom hem width by another inch either side, and angled the side seams. I'd meant to have straight edges, rather than cut on the bias, but I think with folding the seam allowance over to strengthen the base for the eyelets, it'll be sturdy enough.
You may also notice that I didn't iron the fabric before cutting it. Living dangerously over here, but A. I hate ironing and B. This strategy has never bitten me before.
please please please universe that is not a request to prove me wrong.
 |
| Conjoined sleeves! |
The sleeves, to conserve fabric and to ensure they stayed on-grain, I laid out with bottom edges facing each other. I'll cut them apart when I'm ready to start attaching the top layer of fabric, but for now I'm keeping them as a single piece with very large seam allowances.
Next step for this part is finishing the side edges of the bodice pieces, and sewing vast numbers of eyelets. I think it'll be close to 100 total. Oy. Maybe I'll alternate with stitching up the lower sleeves.


Comments
Post a Comment