By the end of this post, there will be a constructed skirt (though no photos of that stage, because it isn't gathered yet and therefore looks like I just folded it funny). But first:
 |
| I wear US size 9, if you were wondering. |
So I may have forgotten how many 7 yards is. It's a lot. No, really. Stop and really think about the measurement "7 yards." Here are some examples:
• 5.25 emperor penguins (that's a little gory, so we'll say it's 5 and a chick)
• 1.4 Honda Civics
• 46.3 iPhones
• 1 fairly large African elephant
• Me, 4 times end to end, plus the width of one hand
• 57.6 incandescent light bulbs, or 57.2 CFL bulbs if you want to be energy-efficient while measuring
• 36 average lionhead goldfish
Anyway, I tried to take a picture to demonstrate that fact, with one of my shoes at each end of the fabric to show the scale, but you can't really see the shoe at the far end and without anything else for scale it's just not...convincing. Other than convincing me that if I were a Serious Seamstress I would have ironed all the fabric, not just the strip I needed flat for trim-pinning purposes.
 |
| There are two ranks of pins on that bottom edge because half of them are holding the trim down and the other half are liars. |
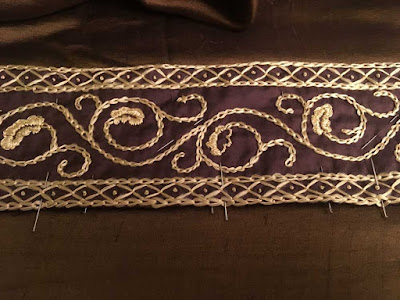
I went back down the length of the pinned trim, measuring and smoothing and pinning to keep the lowest line of chain stitch three inches from the bottom edge (which is selvedge, so won't be subject to any hemming or finishing
unless I decide to tablet weave a second border at some later date). Mostly I wanted to ensure the trim wouldn't shift much on the base fabric as I worked, but I didn't worry too much about the top edge—I don't have enough pins to nail down 14 yards of edge.
 |
| Scissors live in sheaths when they're on top of projects. |
For the most part, I kept the skirt rolled up like a scroll, so I could progressively access more trim as I moved to the left and store away finished sections without having to completely rearrange the fabric each time. This also preserved the other two break room tables in my row from being absorbed by the green swamp monster that is this skirt.
 |
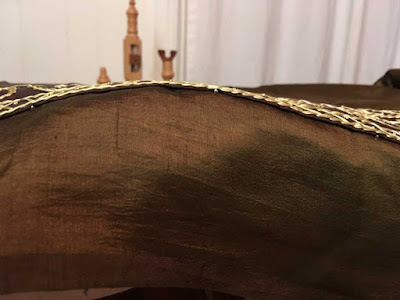
| Color no. 259.7 this fabric has displayed under various lighting conditions. |
A side effect of having the fabric stored so I could see each section spread out completely as I worked down the length of the panel was seeing the weaving flaws I hadn't noticed earlier, which I actually like quite a bit. This one is by far the largest and most striking, at about the diameter of a nickel, but there are several smaller missed threads in the weave. Nothing looks too structurally weak, though, which I appreciate.
 |
| I'm near-sighted and my eyes don't resolve things this clearly. |
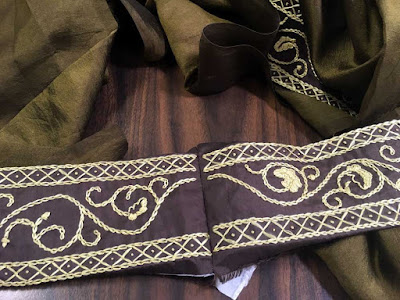
The trim is attached with a very very tiny backstitch hidden in the lacunae of the outer lines of chain stitch, with brown silk thread that sometimes matches the green-gold fabric perfectly and sometimes does not. Not that matching the green-gold was important for this step...I probably should have picked up some thread to match the embroidery base, a dark eggplanty brown that also presents a number of colors under different lights.
 |
| Is that a pink tinge on the fabric? |
Mostly, this is showing off the pin heads hidden under the edge of the embroidery when the trim is stitched down, which I attempted to remove as I went. I missed four total, over the length of both edges of trim on the skirt (or so I think...I may find more when they stab me later).
 |
| Yes, it is a pink tinge, but that's entirely down to having old incandescents in dusty fixtures for "lighting" this photo. |
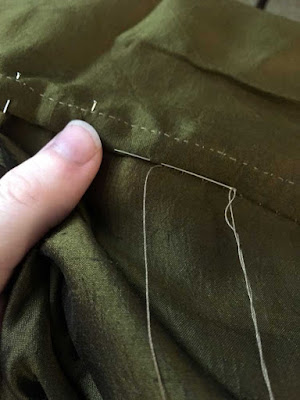
To keep everything neat and tidy as I pinned the upper edge of trim, I laid out the skirt panel on a long table and smoothed the base fabric away from the lower edge just until I saw it distort slightly, then smoothed the bottom edge and pinned the trim in place there. I still have a few slight bubbles and ripples hidden behind the trim, but they're
very slight, and I'm satisfied overall with how neatly the trim sits on the fabric. Shot silk shows off every tiny imperfection dramatically, but there aren't any big pulls or puckers showing on the front of the panel.
 |
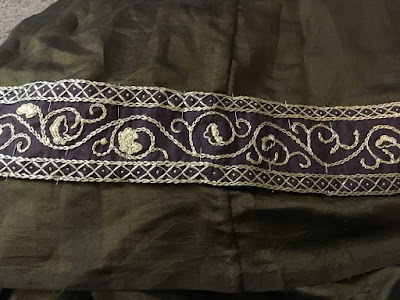
| Three half-leaves and one spray of acorns...lazy embroideress. |
I left the last six inches of trim loose, as I had at the beginning, so I'd have enough ease to fit my tiny embroidery hoop and complete the last leaf and vine spray connecting the trim in a loop.
 |
| Upside down suddenly...it made sense at the time. |
The very beginning and very end actually lined up well—one extremely distorted diamond in the upper border, but the main vine and lower border were almost perfect, and my chain stitching wasn't on a noticeably different scale at beginning and end. I also got to define this as a "skirt" once the trim was connected. Emotionally satisfying as a landmark.
 |
| I had to. Rolling around in it wasn't an option. |
But then my lunch break was over, and I only had time to take a showy picture of the whole mass piled up before packing it away again.
 |
| I started with about half that many pins. |
The last little task before tacking down the end of the trim was to do up the side seam for the skirt (and oh how I love single-panel skirts, with one straight-grain seam to manage). I ended up with about four inches of extra skirt fabric once the trim was tacked down and connected—not too bad for measuring wriggly silk without being able to spread it all out at once. I flipped the skirt inside out and folded up most of the length so it would fit in my friend's living room, and brushed and smoothed and fidgeted with it until it was satisfyingly neat.
The slight striations along the grain of the fabric also helped with squaring up the edges as I pinned them—very literally—inch by inch. I'd already grafted the ends of the embroidery, so the final bottom circumference of the skirt was set. I wanted absolutely no shifting as I seamed the base fabric, and despite knowing that a slightly smaller bottom circumference than top would make
zero difference once I'd gathered the top edge and anchored it to the bodice...well. I am aiming as close to perfection as I can manage now.
 |
| Featuring a lurking very deep crease that I definitely didn't iron out before doing all this. |
I used my tiniest running stitch for the first seam, with a single backstitch about every needle-length. I'm not too worried about strain on this seam, but the periodic backstitches will give it a little reinforcement in case it snags on something. Next was trimming the excess fabric, which I admit I did pretty roughly and while draping the skirt over my lap. Flat-felled seams have many virtues, and hiding an imperfectly cut edge is one of them.
Another round of pinning and then tiny slip stitches to tack down the fold with as little thread showing on the outside as possible, and the skirt seam was done!
 |
| This is a game called "find the seams" because I am very proud of how neat they are. It's an easy game because I took this photo to show you the nice neat seams. |
I am still delighted with how perfectly the base fabric and trim matched when the seams were finished. I mean, I planned it that way, but still. I pinned the last foot or so of trim, checked the spacing from the hem again, and stitched it down.
The very last step in making the skirt is gathering it down to the waist of the bodice plus a few inches on either side to give me enough ease to get into the dress. This means finishing the brocaded tablet woven band I haven't...uh...started...yet. That's fine.
Totally fine. I'll start it very soon, and in the meantime I have plenty to do with constructing the sleeves, finishing the bodice eyelets (a stitched-on band with gaps for threading lacing appears to have been the method in the 12th century, but that would entail further tablet weaving I don't have time for), embroidering and attaching the collar...I'll be plenty busy.


Comments
Post a Comment